Hey there! Are you tired of manually transferring data between different systems? Well, let me introduce you to SSIS (SQL Server Integration Services), a powerful tool that can help you automate and simplify your data integration process. And the best part? You can easily download SSIS and start using it today! Let’s dive in and find out more about this game-changing tool.
How to Download and Use SSIS: A Comprehensive Guide
If you’re looking to streamline your data integration process, SSIS is the perfect tool for you. SSIS (SQL Server Integration Services) is a powerful and versatile data integration tool developed by Microsoft. With SSIS, you can easily extract, transform and load data from multiple sources into your SQL Server or Microsoft Azure database.
In this article, we’ll walk you through the steps of downloading, installing and using SSIS. Whether you’re a beginner or an experienced SSIS user, you’ll find this guide helpful in setting up your data integration process.
Downloading SSIS
Before you can start using SSIS, you’ll need to download and install it on your local machine or server. Here’s a step-by-step guide on how to download SSIS:
1. Go to the Microsoft website and navigate to the download page for SQL Server Integration Services.
2. Select the version of SSIS you want to download. You’ll have the option to download either the standalone version or the version that comes with SQL Server. Make sure to select the correct version for your needs.
3. Click on the download button to start the download process. The size of the download may vary depending on the version you choose.
4. Once the download is complete, double-click on the installation file to start the installation process. Follow the on-screen instructions to complete the installation.
Installing SSIS
After downloading SSIS, the next step is to install it on your local machine or server. Here’s how to do it:
1. Launch the installation file you downloaded earlier.
2. Select “Installation” from the left-hand menu and then click on “New SQL Server stand-alone installation or add features to an existing installation.”
3. Follow the on-screen instructions to accept the license agreement, choose the installation location, and select the installation features you want to include.
4. Once you’ve selected your preferred installation options, click on the “Install” button to start the installation process.
5. Wait for the installation process to complete. This may take several minutes, depending on the installation options you selected.
Using SSIS
Now that you’ve successfully installed SSIS, it’s time to start using it to integrate your data. Here’s a step-by-step guide on how to do it:
1. Launch SQL Server Management Studio (SSMS) on your local machine or server.
2. Click on the “Integration Services Catalogs” tab in the Object Explorer pane.
3. Right-click on the “SSISDB” folder and select “Create Catalog.”
4. Follow the on-screen instructions to create a new catalog. Make sure to select the appropriate encryption option and specify the SQL Server Agent service account.
5. Once the catalog is created, right-click on it and select “Properties.”
6. In the Catalog Properties dialog box, select the “Security” tab and grant appropriate permissions to the SSIS users and roles.
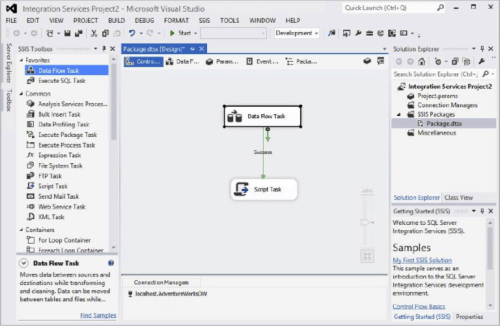
7. Open a new SSIS project in SQL Server Data Tools (SSDT).
8. In the “Solution Explorer” pane, right-click on the “SSIS Packages” folder and select “New SSIS Package.”
9. Drag and drop the necessary data flow components from the “SSIS Toolbox” onto the design surface of the package.
10. Configure the data flow components to specify the source, destination, and transformation logic of your data integration process.
11. Save the SSIS package and deploy it to the SSIS catalog you created earlier.
12. Open SQL Server Agent and create a new job.
13. Add a new step to the job and select “SQL Server Integration Services Package” as the step type.
14. Specify the name of the SSIS package, the server name, and the file path of the package in the “Command” tab of the job step properties.
15. Configure other job properties such as the schedule, notification, and output options as needed.
16. Save and run the job to execute the SSIS package.
Conclusion
Using SSIS for your data integration needs can greatly simplify your workflow and improve the efficiency of your data management process. With the above guide, you now know how to download, install and use SSIS effectively. Remember to always follow the best practices of data integration and keep your SSIS packages updated to ensure optimal performance. Happy integrating!
